The goal of grain handling, at a high level, is storage and milling of your grain, delivery to your brewhouse, and removal of spent grain in an efficient and timely manner (as this has a huge effect on your brew cycle and overheads).
While saving time, it is, of course, important that the malt/grain handling process is repeatable and runs without errors while treating your grain with care.
Thinking the process through is important because it can affect color, brewhouse efficiency, alcohol by volume (ABV), flavor, and clarity of your brews. Each of these also plays a pivotal role in the consistency of your products and in how the market will perceive them.
Below is some important terminology that will be used throughout this blog:
Grain: Raw material
Milling: The act of crushing the grain, in preparation for the next step of the brewing process. Read more here on the importance of the milling process!
Grist: Milled grain
MT: Mash Tun
MLT: Mash Lauter Tun
Getting it into your brewhouse
There are a handful of methods for getting your grist into your MT or MLT. Whether you are feeding your grist into a grist case first or directly into your grist hydrator, here are some popular setups from simplest to more complex.
Manually dumping grist into mt or MLT
The simplest way to get your grist into your MT or MLT is by pouring it in through the manway. This method requires time, physical effort, and energy, as you will mill into grain bags and then have to carry them to your brewhouse.
We have designed hoppers feeding a grist hydrator so you can transfer grist into the hopper and still be able to hit the grist with strike water. With this technology, you won’t have to deal with a build-up of grist lumps that often appear when pouring grist into the vessel manway.
With our design, you can adjust water flow and temperature to the desired malt-to-water ratio, achieving a homogenous mashing-in procedure that gives you the best results for your manual mashing process.
We recommend this method for smaller systems (~5BBL/600L and below). We usually see grain bills of 100-150 kilos of grain for these sized systems, depending on the beer, so it is only 4 – 6 bags of grain which is manageable.
However, once brewers use an 840L/7BBL system, that process becomes a bit more tedious. Here are some improved options that use equipment to get your grist into your brewhouse:
Mill → Auger → Brewhouse

Grist Case Mounted Mill (Mezzanine) → Auger → Brewhouse
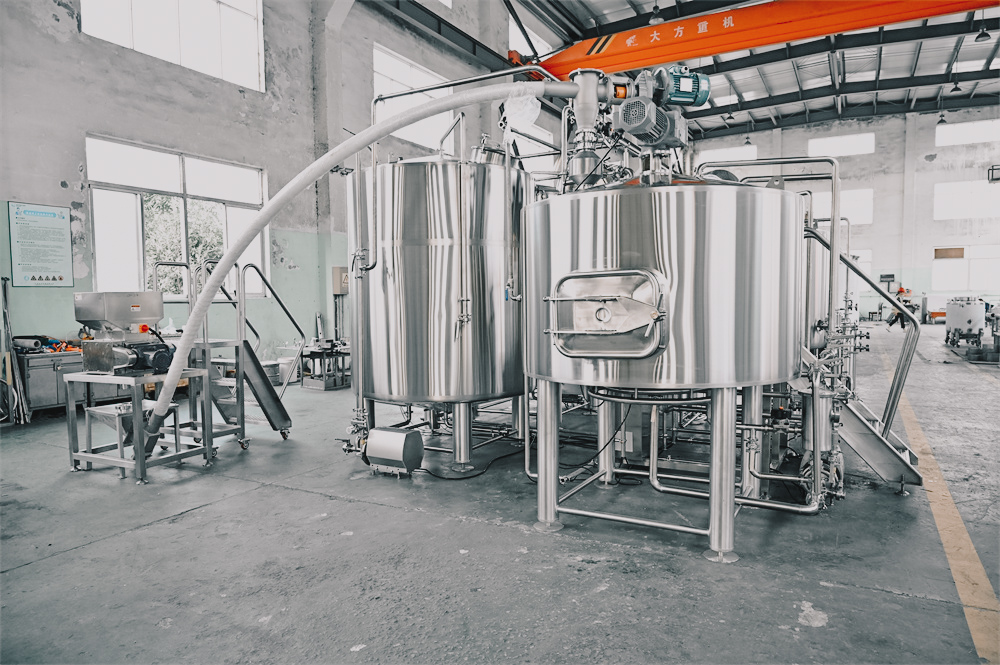
This system has a floor-mounted mill that is connected to the brewhouse by an auger. We call this “live” milling as you are milling while also mashing in. This setup usually takes 2 staff, so from a labor perspective, it is not the best.

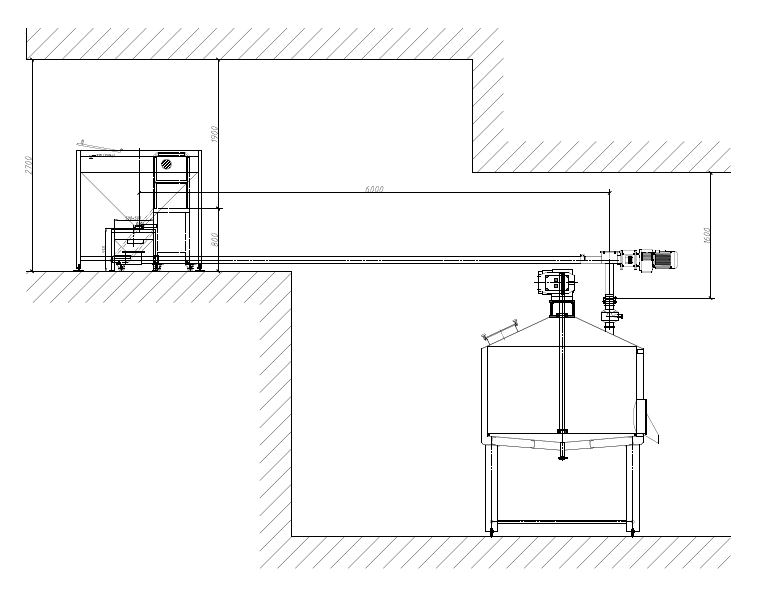
In this setup, the grist case and mill are on a mezzanine and then delivered to the brewhouse via gravity. This client did not have enough height to use gravity, so we provided an auger that took the grist to the grist hydrator running parallel to the floor.
Grist Case Mounted Mill → Auger → Brewhouse

In this setup, the mill is mounted on top of the grist case, so you can mill your entire brew into the grist case either the night before or at the beginning of the day. From there, you just need to turn on the auger while you are on the platform and can concentrate on liquor flow, temperature, etc.
The downside to this setup is the grist case can take up valuable brewery floor space.
Mill → Auger → Vessel-Mounted grist case → Brewhouse

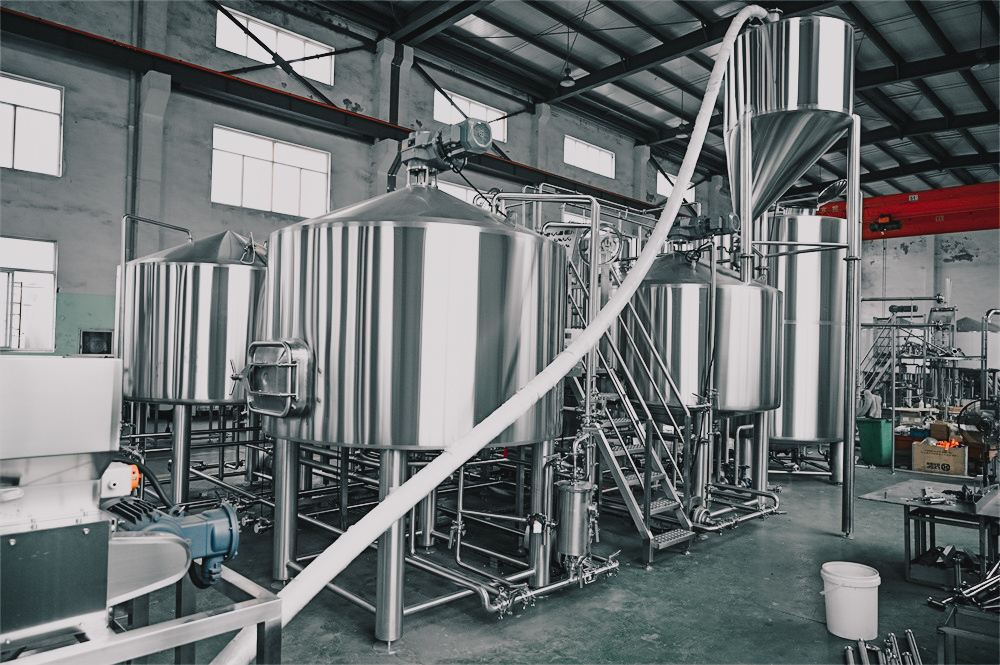
In this setup, the grist case is mounted above the MT/MLT, which is supported by legs mounted directly to the vessel. You do not have to rely on an auger to bring the grist to the brewhouse, as you will just use gravity and a valve to control the speed of the grist.
We find this solution the most popular as you can mill the day before the brew and not have to worry about the mill or the auger to deliver the grist to the brewhouse. You also can save brewery floor space.
Mill → Auger → Floor-Mounted Grist Case → Auger → Brewhouse

This setup entails a two-part process. First, there is an auger connected from the grist mill to a floor-mounted grist case. Then, there is another auger connecting the grist case to the brewhouse.
This setup requires two augers that bring significant advantages to your process:
- Health and Safety: Grain lifting has no stairs involved and shorter ways
- Pre-loading grist case the day before brew day
- You can prepare the following brew while the first brew is still in MT/ MLT
- Manageable by one person in the brewhouse
Breweries with over 3 brews per day could look into a bespoke solution, implementing a malt/grain bin with a further auger that delivers the malt to the mill in the above-described system. In this way, you will be able to pre-prepare brews in a much faster way.
Grist Delivery Methods
Two of the most popular delivery methods are flex augers and chain and disc conveyor. In the table below we compare their pros and cons:
Flex Augers
Tube with a screw-like mechanism that moves the grain
Pros
Cons
- Cheaper
- Simpler solution
- More rigid – can only handle certain curves
- Possible clogging
- Harder on the grain – rotating motion can lead to pulverized grist
- Unable to change directions
Chain and Disc Conveyor
Tube with discs connected by a chain that drags the grain along
Pros
Cons
- Gentler on the grain
- Ability to move in more complex ways (i.e. horizontally and vertically)
- More parts
- More complicated
- More costly
Get in touch if you have any further questions about the next steps in the process.


